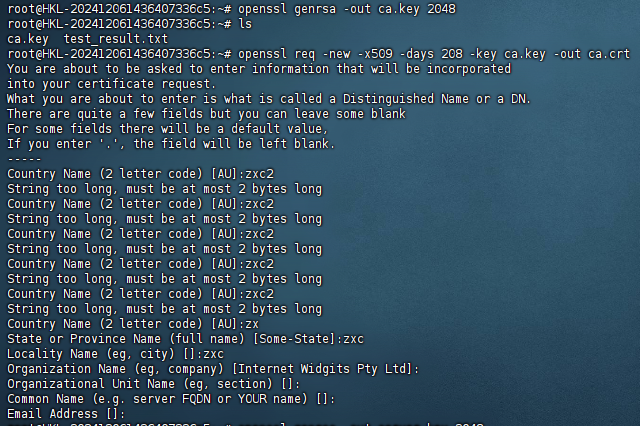
1、创建私钥
openssl genrsa -out ca.key 2048
2 创建公钥
openssl req -new -x509 -days 208 -key ca.key -out ca.crt

3生成密钥对
先装备两个文件openssl.cnf v3.ext。 其中的 IP.1 记得对应
openssl.cnf 如下:
[req]
distinguished_name = req_distinguished_name
req_extensions = v3_req

[req_distinguished_name]
countryName = Country Name (2 letter code)
countryName_default = US
stateOrProvinceName = State or Province Name (full name)
stateOrProvinceName_default = NY
localityName = Locality Name (eg, city)
localityName_default = NYC
organizationalUnitName  = Organizational Unit Name (eg, section)
organizationalUnitName_default  = xxx
commonName = xxx
commonName_max  = 64

[ v3_req ]
# Extensions to add to a certificate request
basicConstraints = CA:TRUE
keyUsage = nonRepudiation, digitalSignature, keyEncipherment
subjectAltName = @alt_names

[alt_names]
IP.1 = 356.121.271.20
v3.ext 如下:
 authorityKeyIdentifier=keyid,issuer
basicConstraints=CA:FALSE
keyUsage=digitalSignature, nonRepudiation, keyEncipherment, dataEncipherment
subjectAltName=@alt_names
[alt_names]
IP.1 = 356.121.271.20
4 生成服务器证书
生成私钥server.key
openssl genrsa -out server.key 2048生成公钥
openssl req -new -days 208 -key server.key -out server.csr -config openssl.cnf
自签名
openssl x509 -days 208 -req -sha256 -extfile v3.ext -CA ca.crt -CAkey ca.key -CAcreateserial -in server.csr -out server.crt
